

Enabling the add-in
1
Open integration settings
Navigate to your workspace integration settings in Langdock.
2
Enable the add-in
Find the Outlook add-in and toggle it on.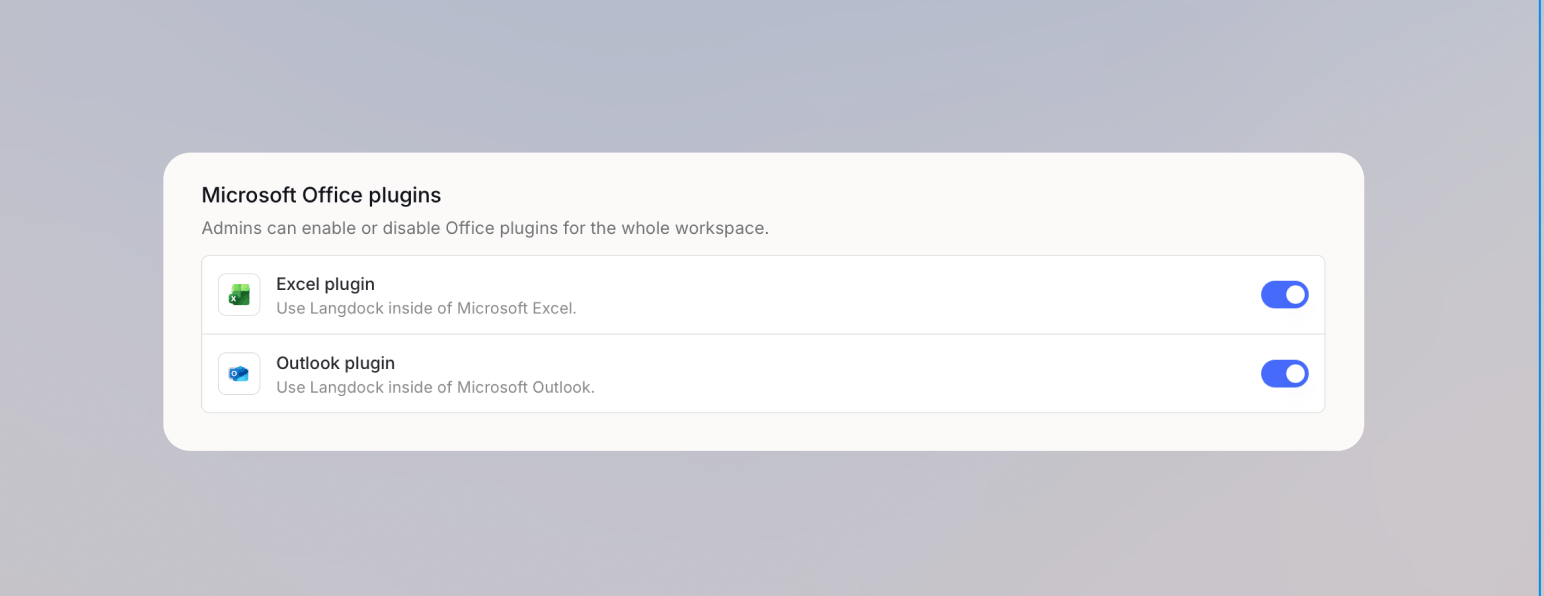
Enabling the add-in for dedicated deployments
Before you start, make sure you have Microsoft admin access to the Microsoft 365 Admin Portal and Langdock admin access to your Workspace. Setting up the Outlook add-in involves three parts:- A Microsoft admin deploys the custom app in the Microsoft 365 Admin Portal
- A Langdock admin enables the Outlook add-in in Langdock as described above
- Each user opens the Add-in in Outlook and signs in
Upload the custom app in Microsoft 365
This step must be completed by a Microsoft admin.1
Open Integrated apps
Navigate to Settings > Integrated apps in the Microsoft 365 Admin Portal sidebar.
2
Upload the custom app
On the Integrated apps page, click Upload custom apps.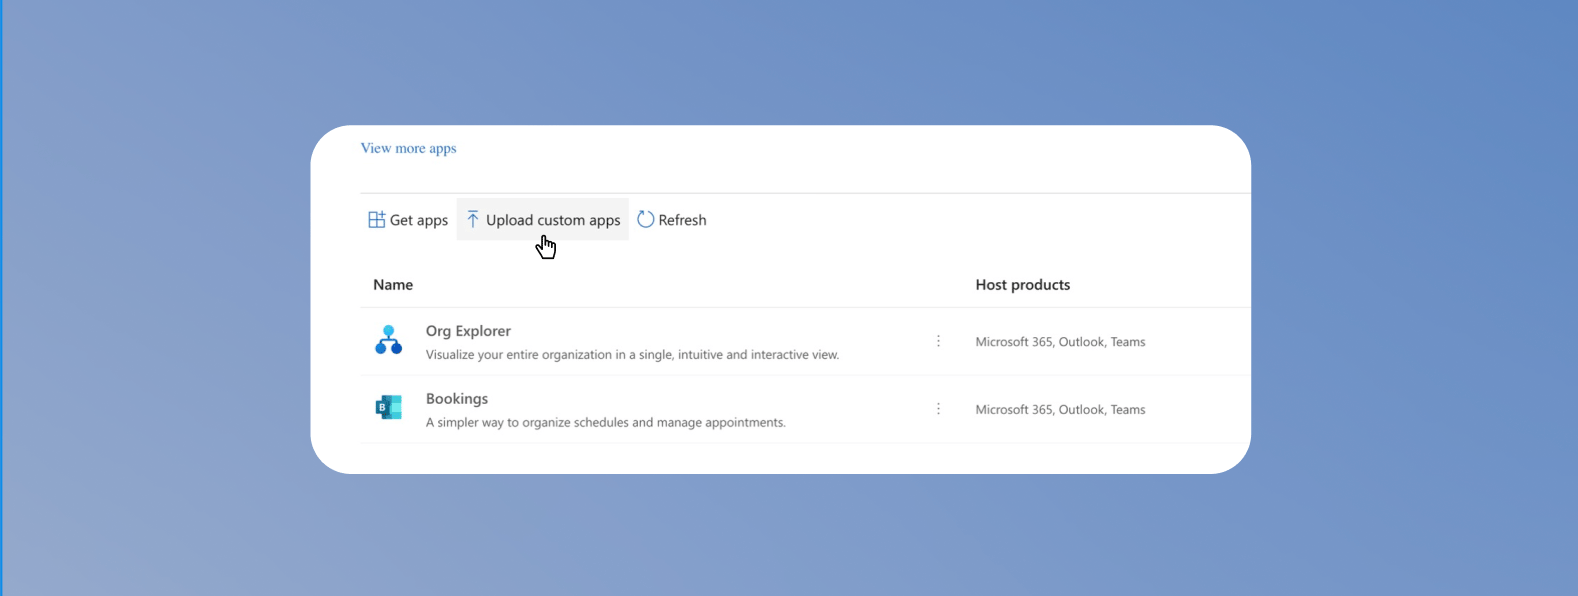
3
Configure the app deployment
In the New App Deployment window, select: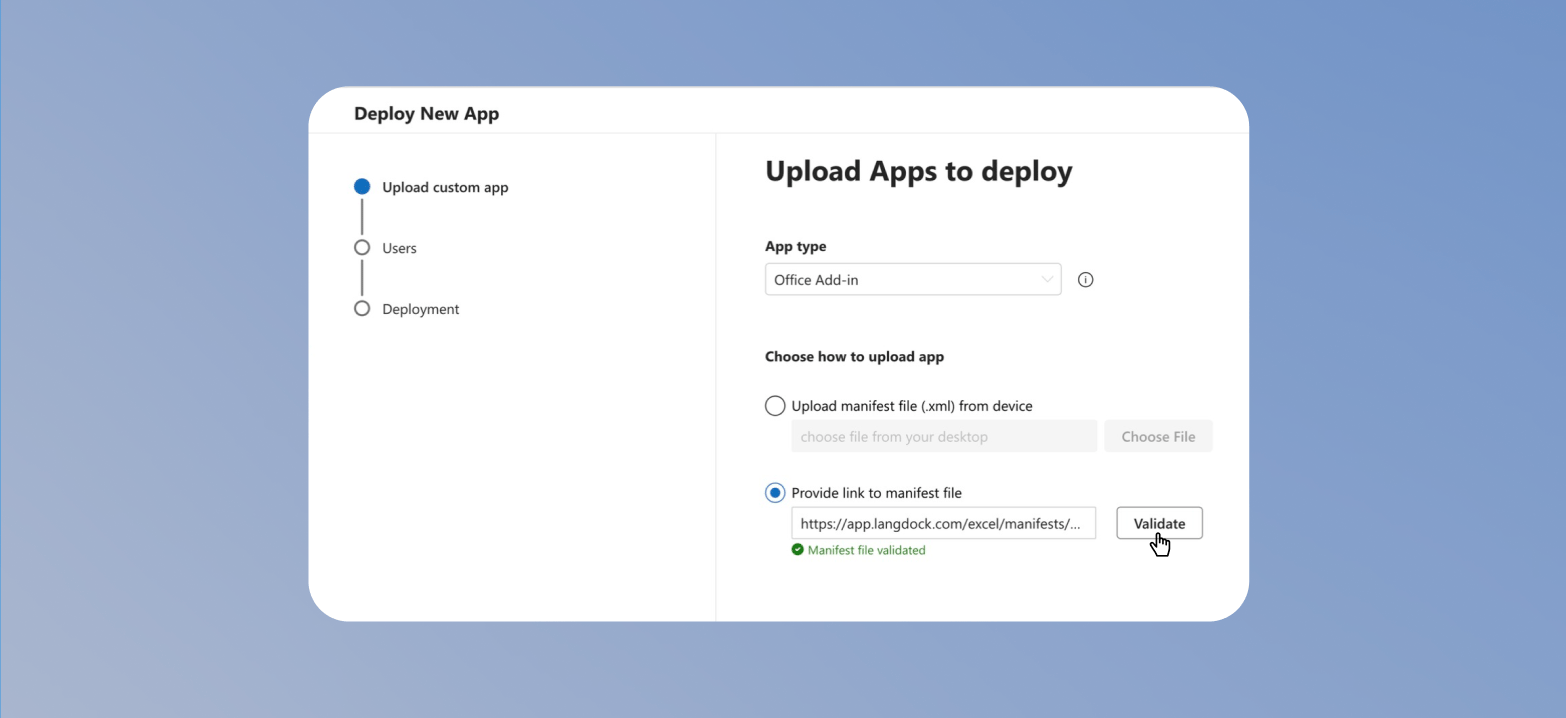
- App type: Office Add-in
- Upload option: Provide link to manifest file
- Manifest link:
https://<your-deployment-url>/api/addin/dedicated/outlook/manifest.xml
4
Assign the target group
Choose who should get access to the Outlook add-in, then click Next.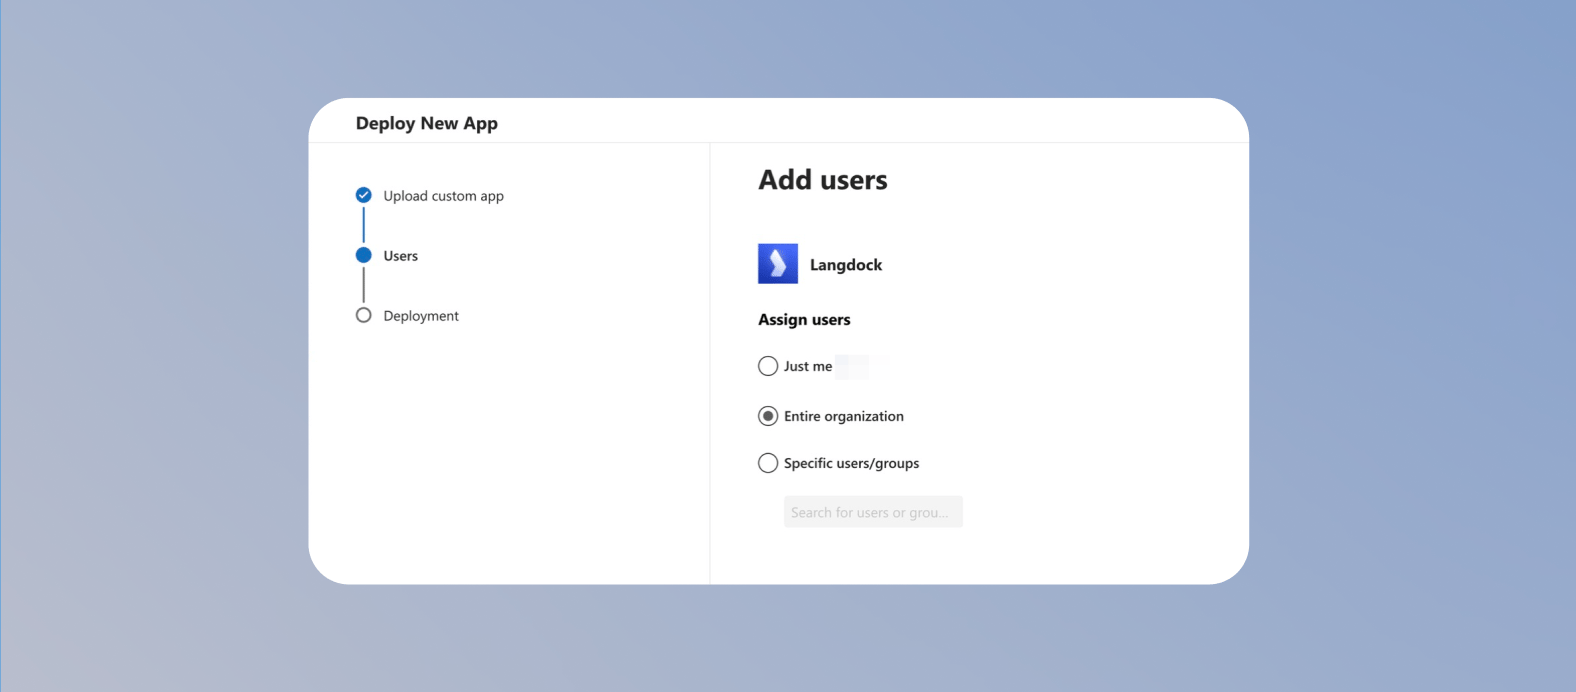
- Select Entire organization if every user in your Microsoft 365 tenant should get access.
- Select Specific users/groups if you want to roll out the add-in to a smaller group first.
- Select Just me only if you want to test the add-in before a wider rollout.
5
Finish deployment
Review the configuration and click Finish Deployment.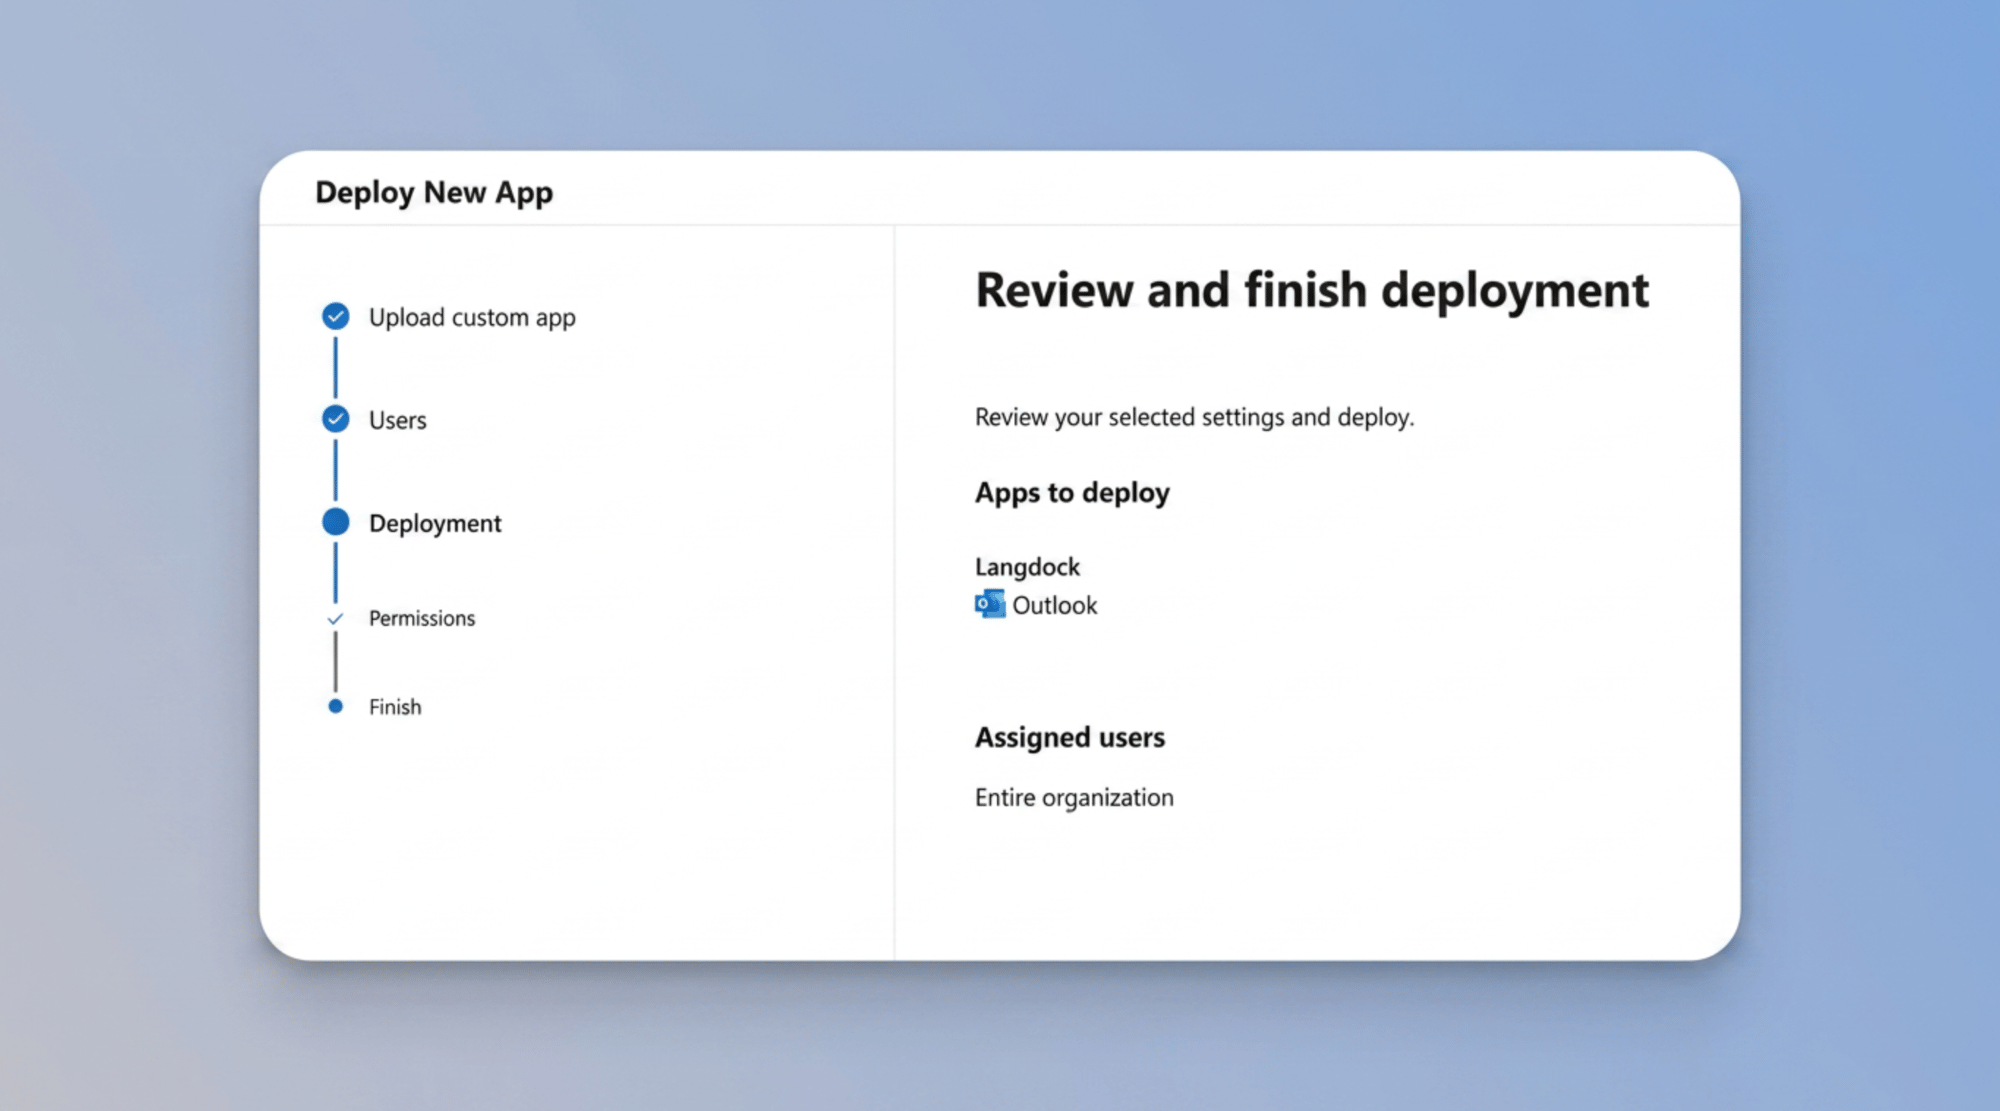
6
Confirm the Add-in appears
Confirm that the Add-in appears on the overview page.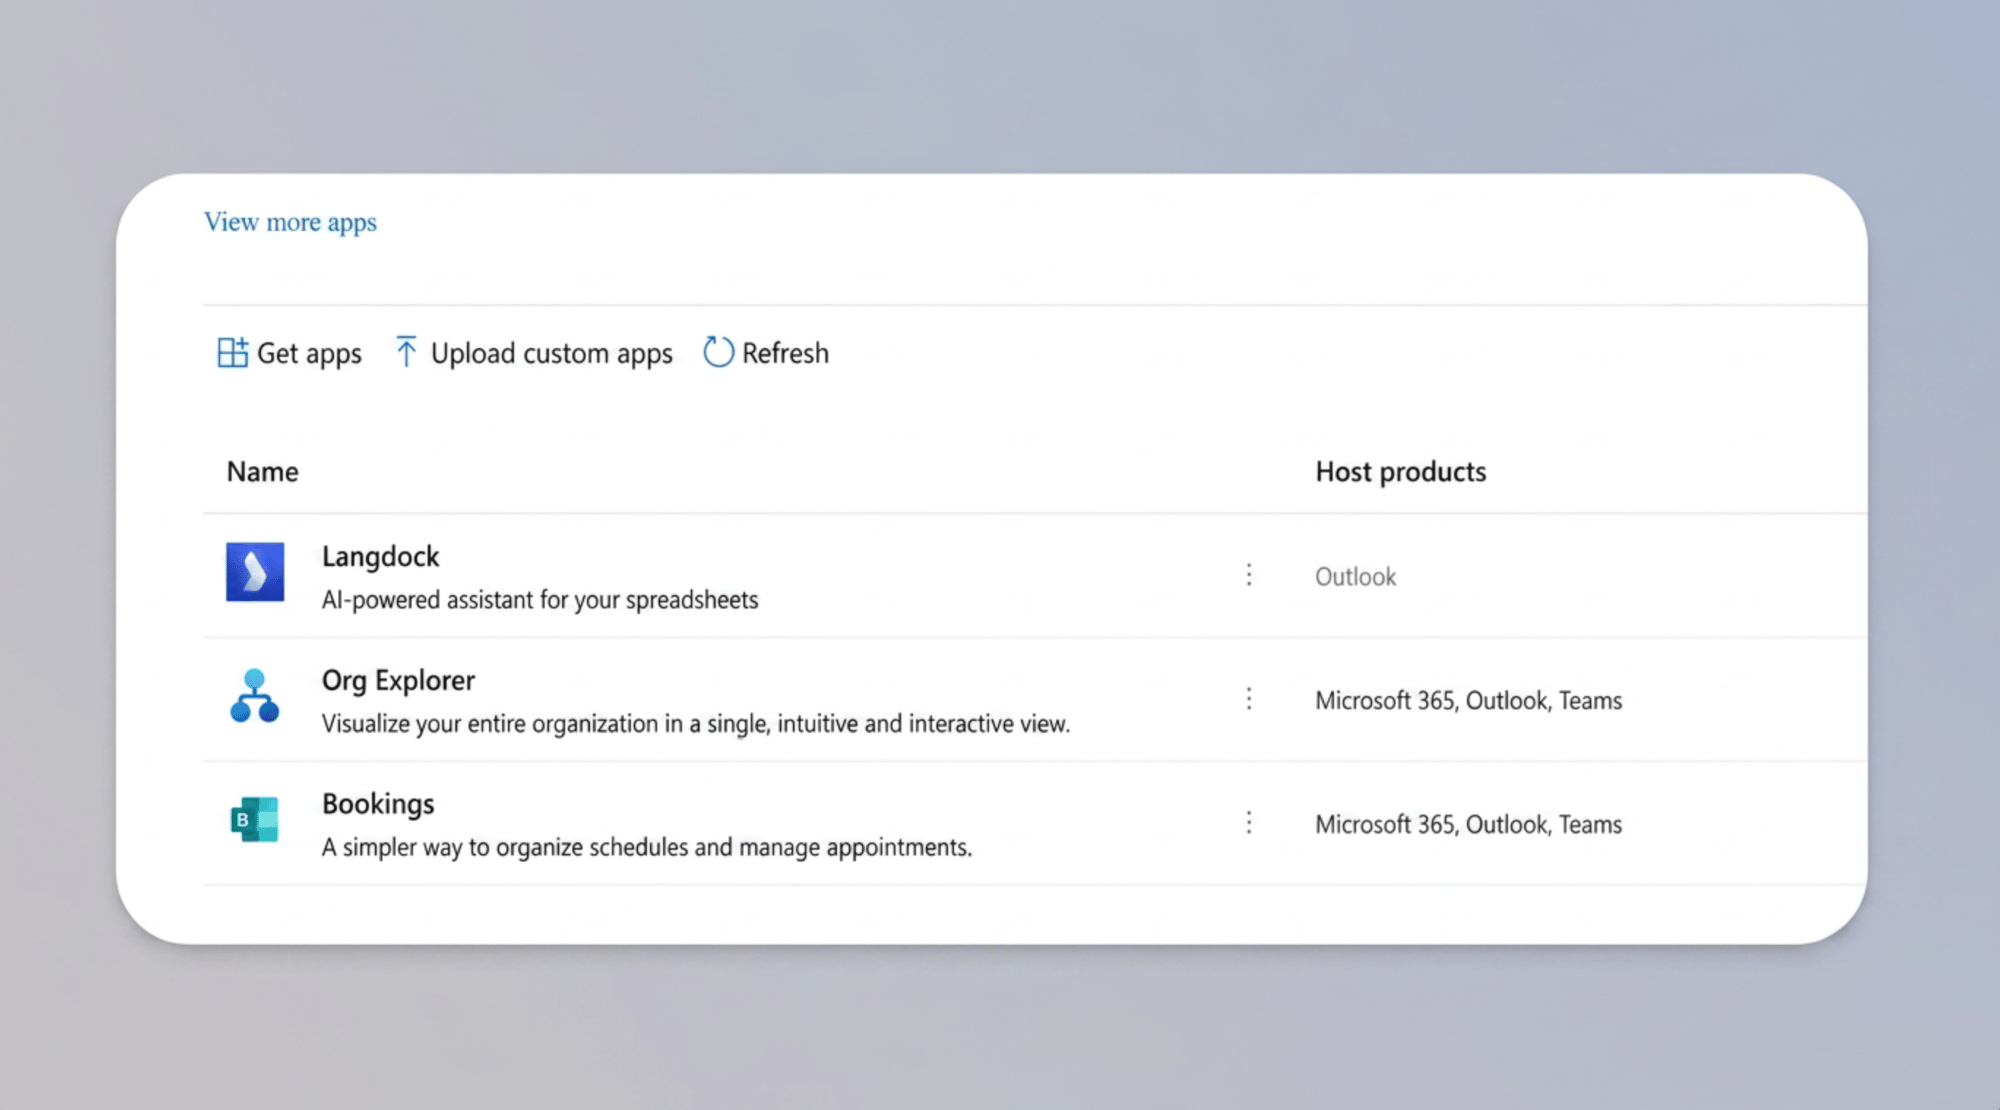
Update the add-in in Microsoft 365
When Langdock releases a new version of the Outlook add-in, for example with a new name or icon, a Microsoft admin applies it once for your organization. Microsoft doesn’t update custom add-ins automatically. Update the existing Add-in instead of uploading it again, so users don’t see it twice.1
Open the Add-in
Navigate to Settings > Integrated apps in the Microsoft 365 Admin Portal and select the Outlook add-in you deployed.
2
Update the manifest
Click Update add-in. Provide the same manifest link you used during setup,
https://<your-deployment-url>/api/addin/dedicated/outlook/manifest.xml, and click Validate.3
Finish the update
Keep the existing target group, then click Accept and update.
Removing the add-in
How you remove the Outlook add-in depends on how it was installed. If a Microsoft admin deployed it in Integrated apps, which is always the case on dedicated deployments, the admin removes it there for everyone. If someone installed it from the Microsoft Marketplace with Get it now, it belongs to their own mailbox and stays after the admin deployment is removed, so they remove it in Outlook. Turning the add-in off in the Langdock integration settings doesn’t uninstall it, it only stops users from using it.Remove the add-in in Microsoft 365
This step must be completed by a Microsoft admin.1
Open the Add-in
Navigate to Settings > Integrated apps in the Microsoft 365 Admin Portal and select the Outlook add-in you deployed.
2
Remove the Add-in
On the Overview tab, choose to remove the app. Select Yes, I’m sure I want to remove the app and associated data and click Remove.
Remove the add-in from your own Outlook
If you installed the add-in yourself from the Microsoft Marketplace, for example while testing, remove it in Outlook. This copy stays even after the admin deployment is removed.1
Open your apps
In Outlook, select More apps > Add apps, or All apps > Add apps in classic Outlook, and click Manage your apps.
2
Remove Langdock
Find Langdock in the list, select More options > Remove, and restart Outlook.