Documentation Index
Fetch the complete documentation index at: https://docs.langdock.com/llms.txt
Use this file to discover all available pages before exploring further.
Understanding Workflow Costs
Workflows consume AI credits based on what they do. The main cost drivers are:AI Agent Nodes
The biggest expense in most workflows. Costs depend on:- Model used: Larger models cost more than smaller ones
- Input length: How much data you send to the agent
- Output length: How much the agent generates
- Tool usage: Web searches, code execution, and integrations add costs
Other Nodes
- Web Search nodes: Small fee per search
- Action nodes: Usually free (no AI involved)
- Code/Condition/Loop nodes: Free (just logic)
- HTTP requests and notifications: Free
Monitoring Costs
Per-Node Costs
After a workflow run, each node shows a cost badge in its footer. Hover over it to see:- Total cost for that node
- Per-model breakdown with input/output tokens
- Cost per model used
Per-Run Costs
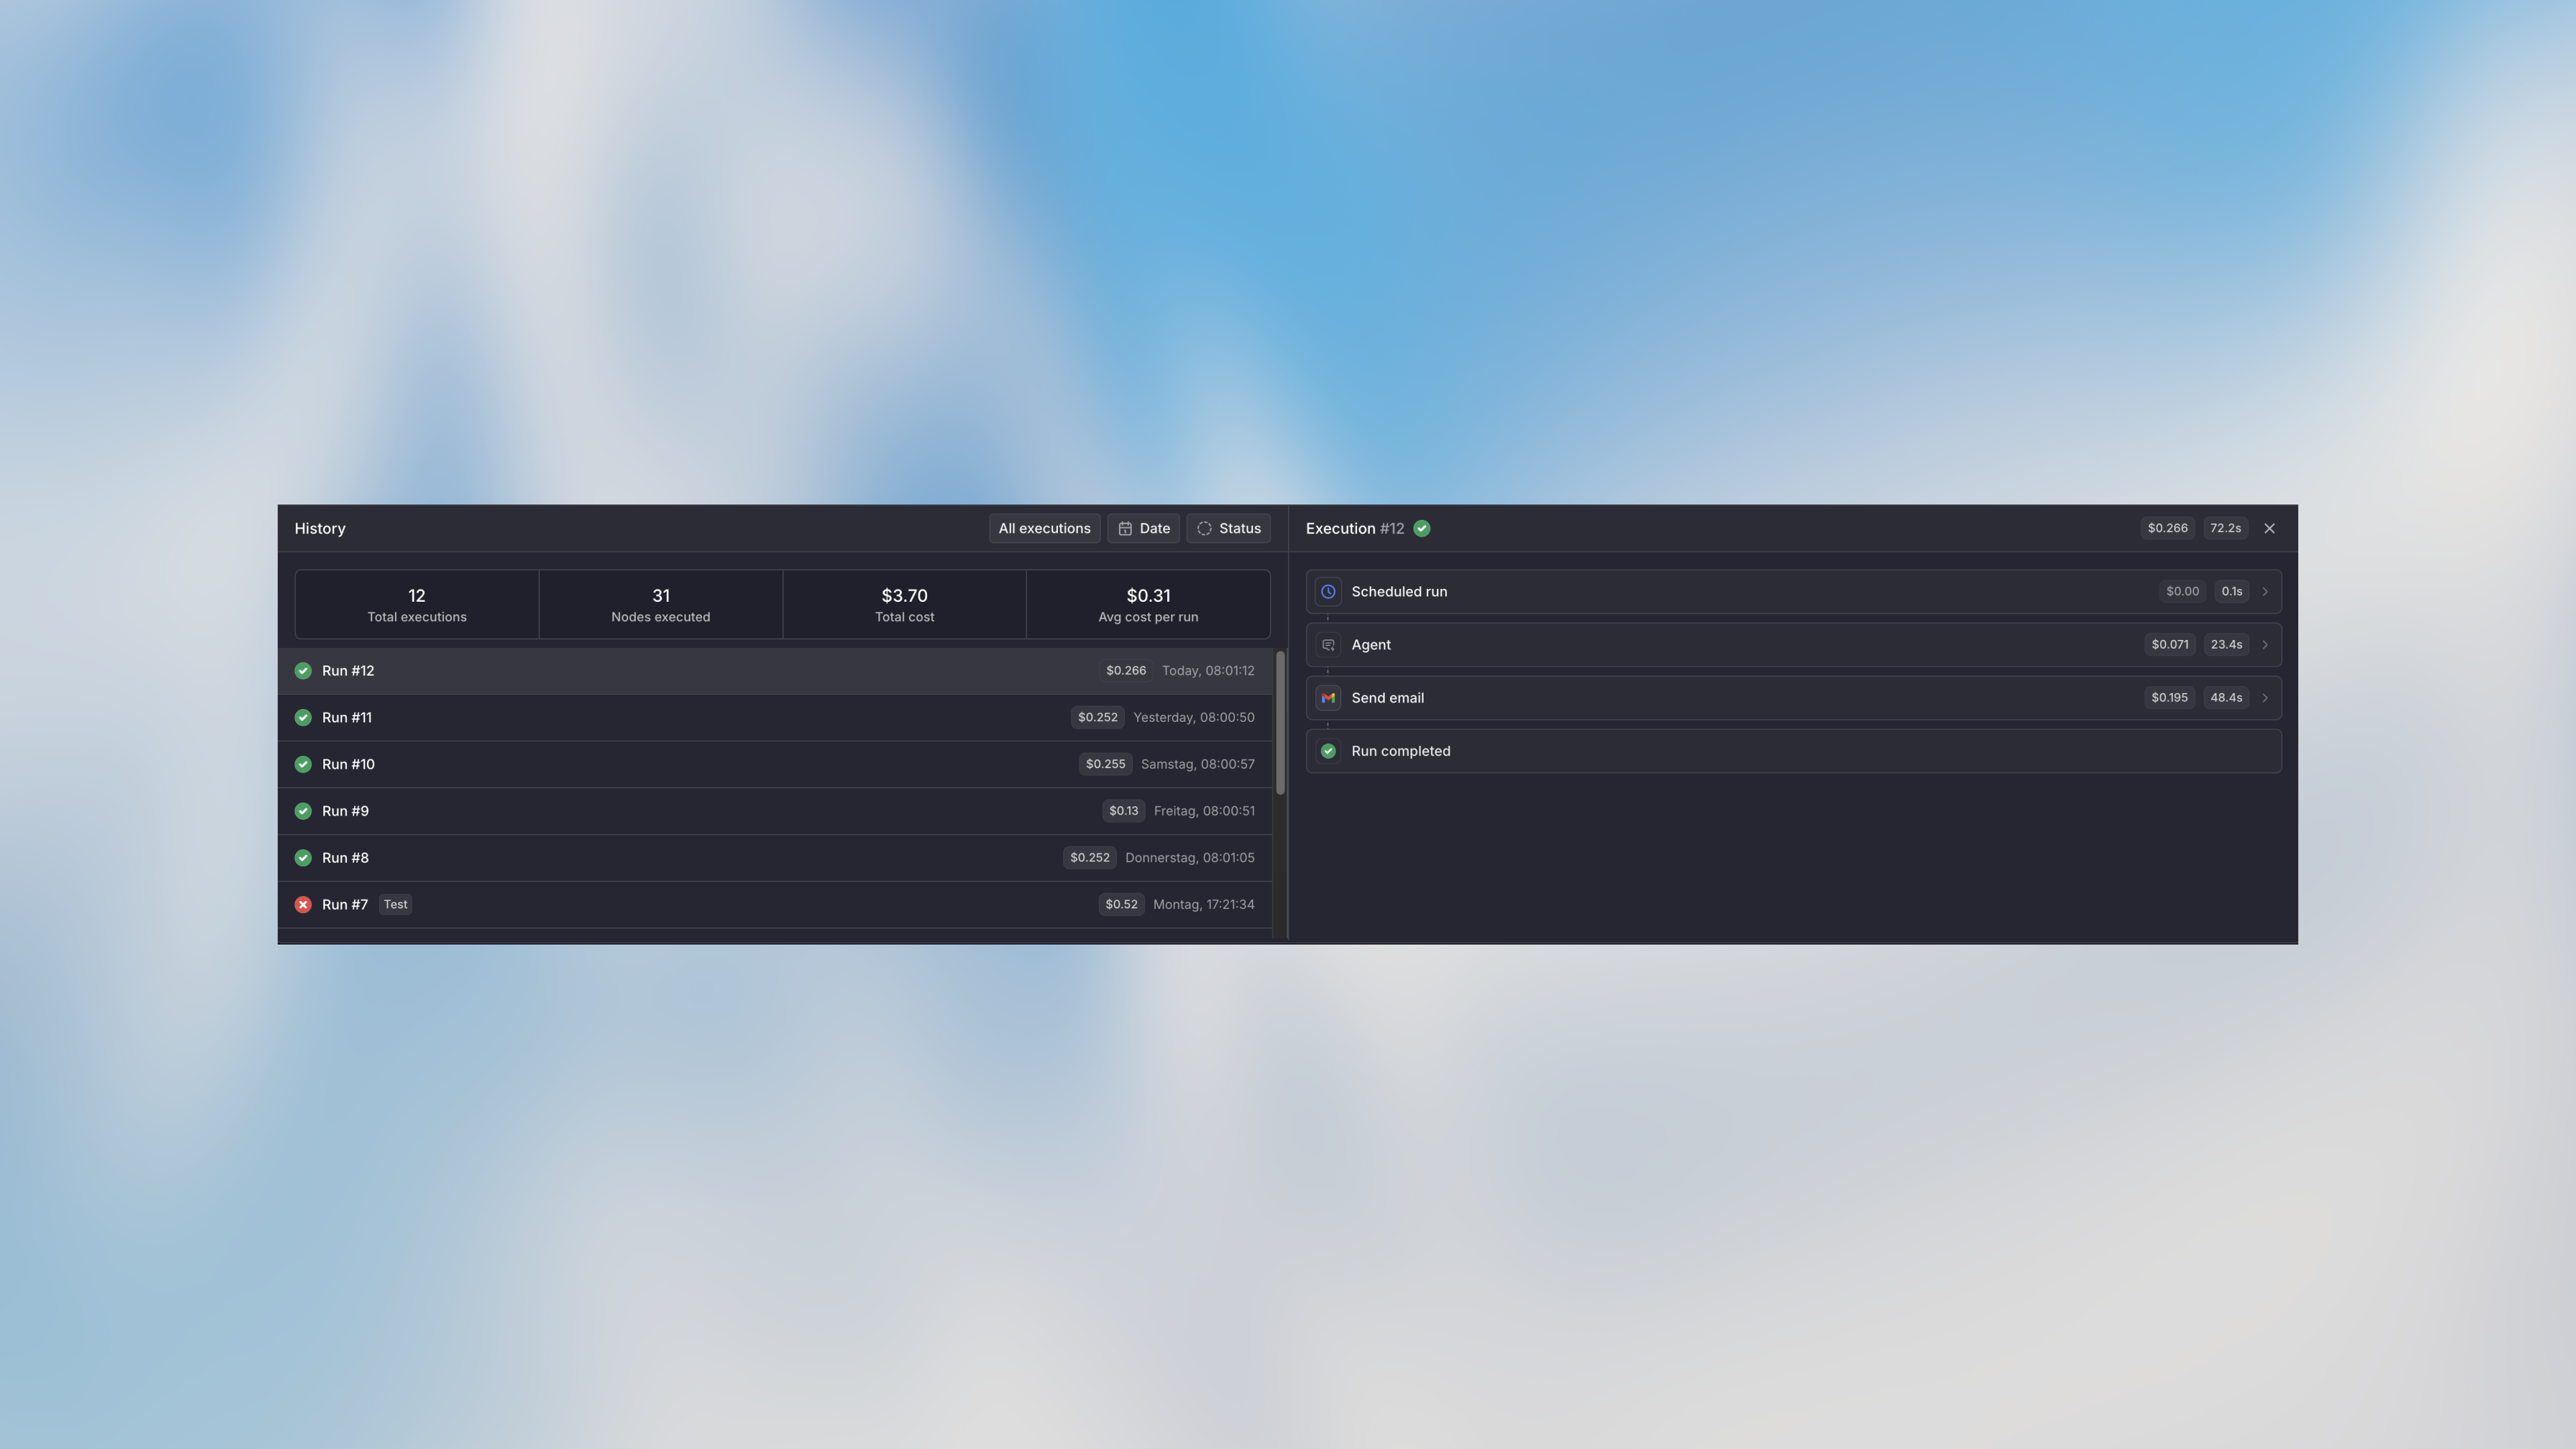
- Click on any run in the history
- See total execution cost
- Click individual nodes to see their cost breakdown
Workflow-Level Costs
The history panel shows aggregate stats:- Total runs
- Nodes executed
- Total cost (all-time)
- Average cost per run
Setting Cost Limits
Monthly Limit
Set a maximum spending cap for the workflow per month:- Go to workflow settings
- Set Monthly Limit (e.g., $100)
- New runs are blocked when the limit is reached
- Progress bar shows current spend vs limit
Per-Execution Limit
Prevent runaway costs from a single run:- Set Execution Limit (e.g., $5 per run)
- Run stops if it exceeds this amount
- Useful for catching issues with loops or large data
Hourly Rate Limit
Control how often the workflow can run:- Set Max Executions Per Hour
- Prevents trigger floods from overwhelming your budget
- Useful for webhook-triggered workflows
Alert Thresholds
Get notified before hitting limits:- Add custom alert amounts (e.g., 50)
- Receive email notifications when crossing each threshold
- Built-in alerts at 50% and 90% of monthly limit
Cost Limits Hierarchy
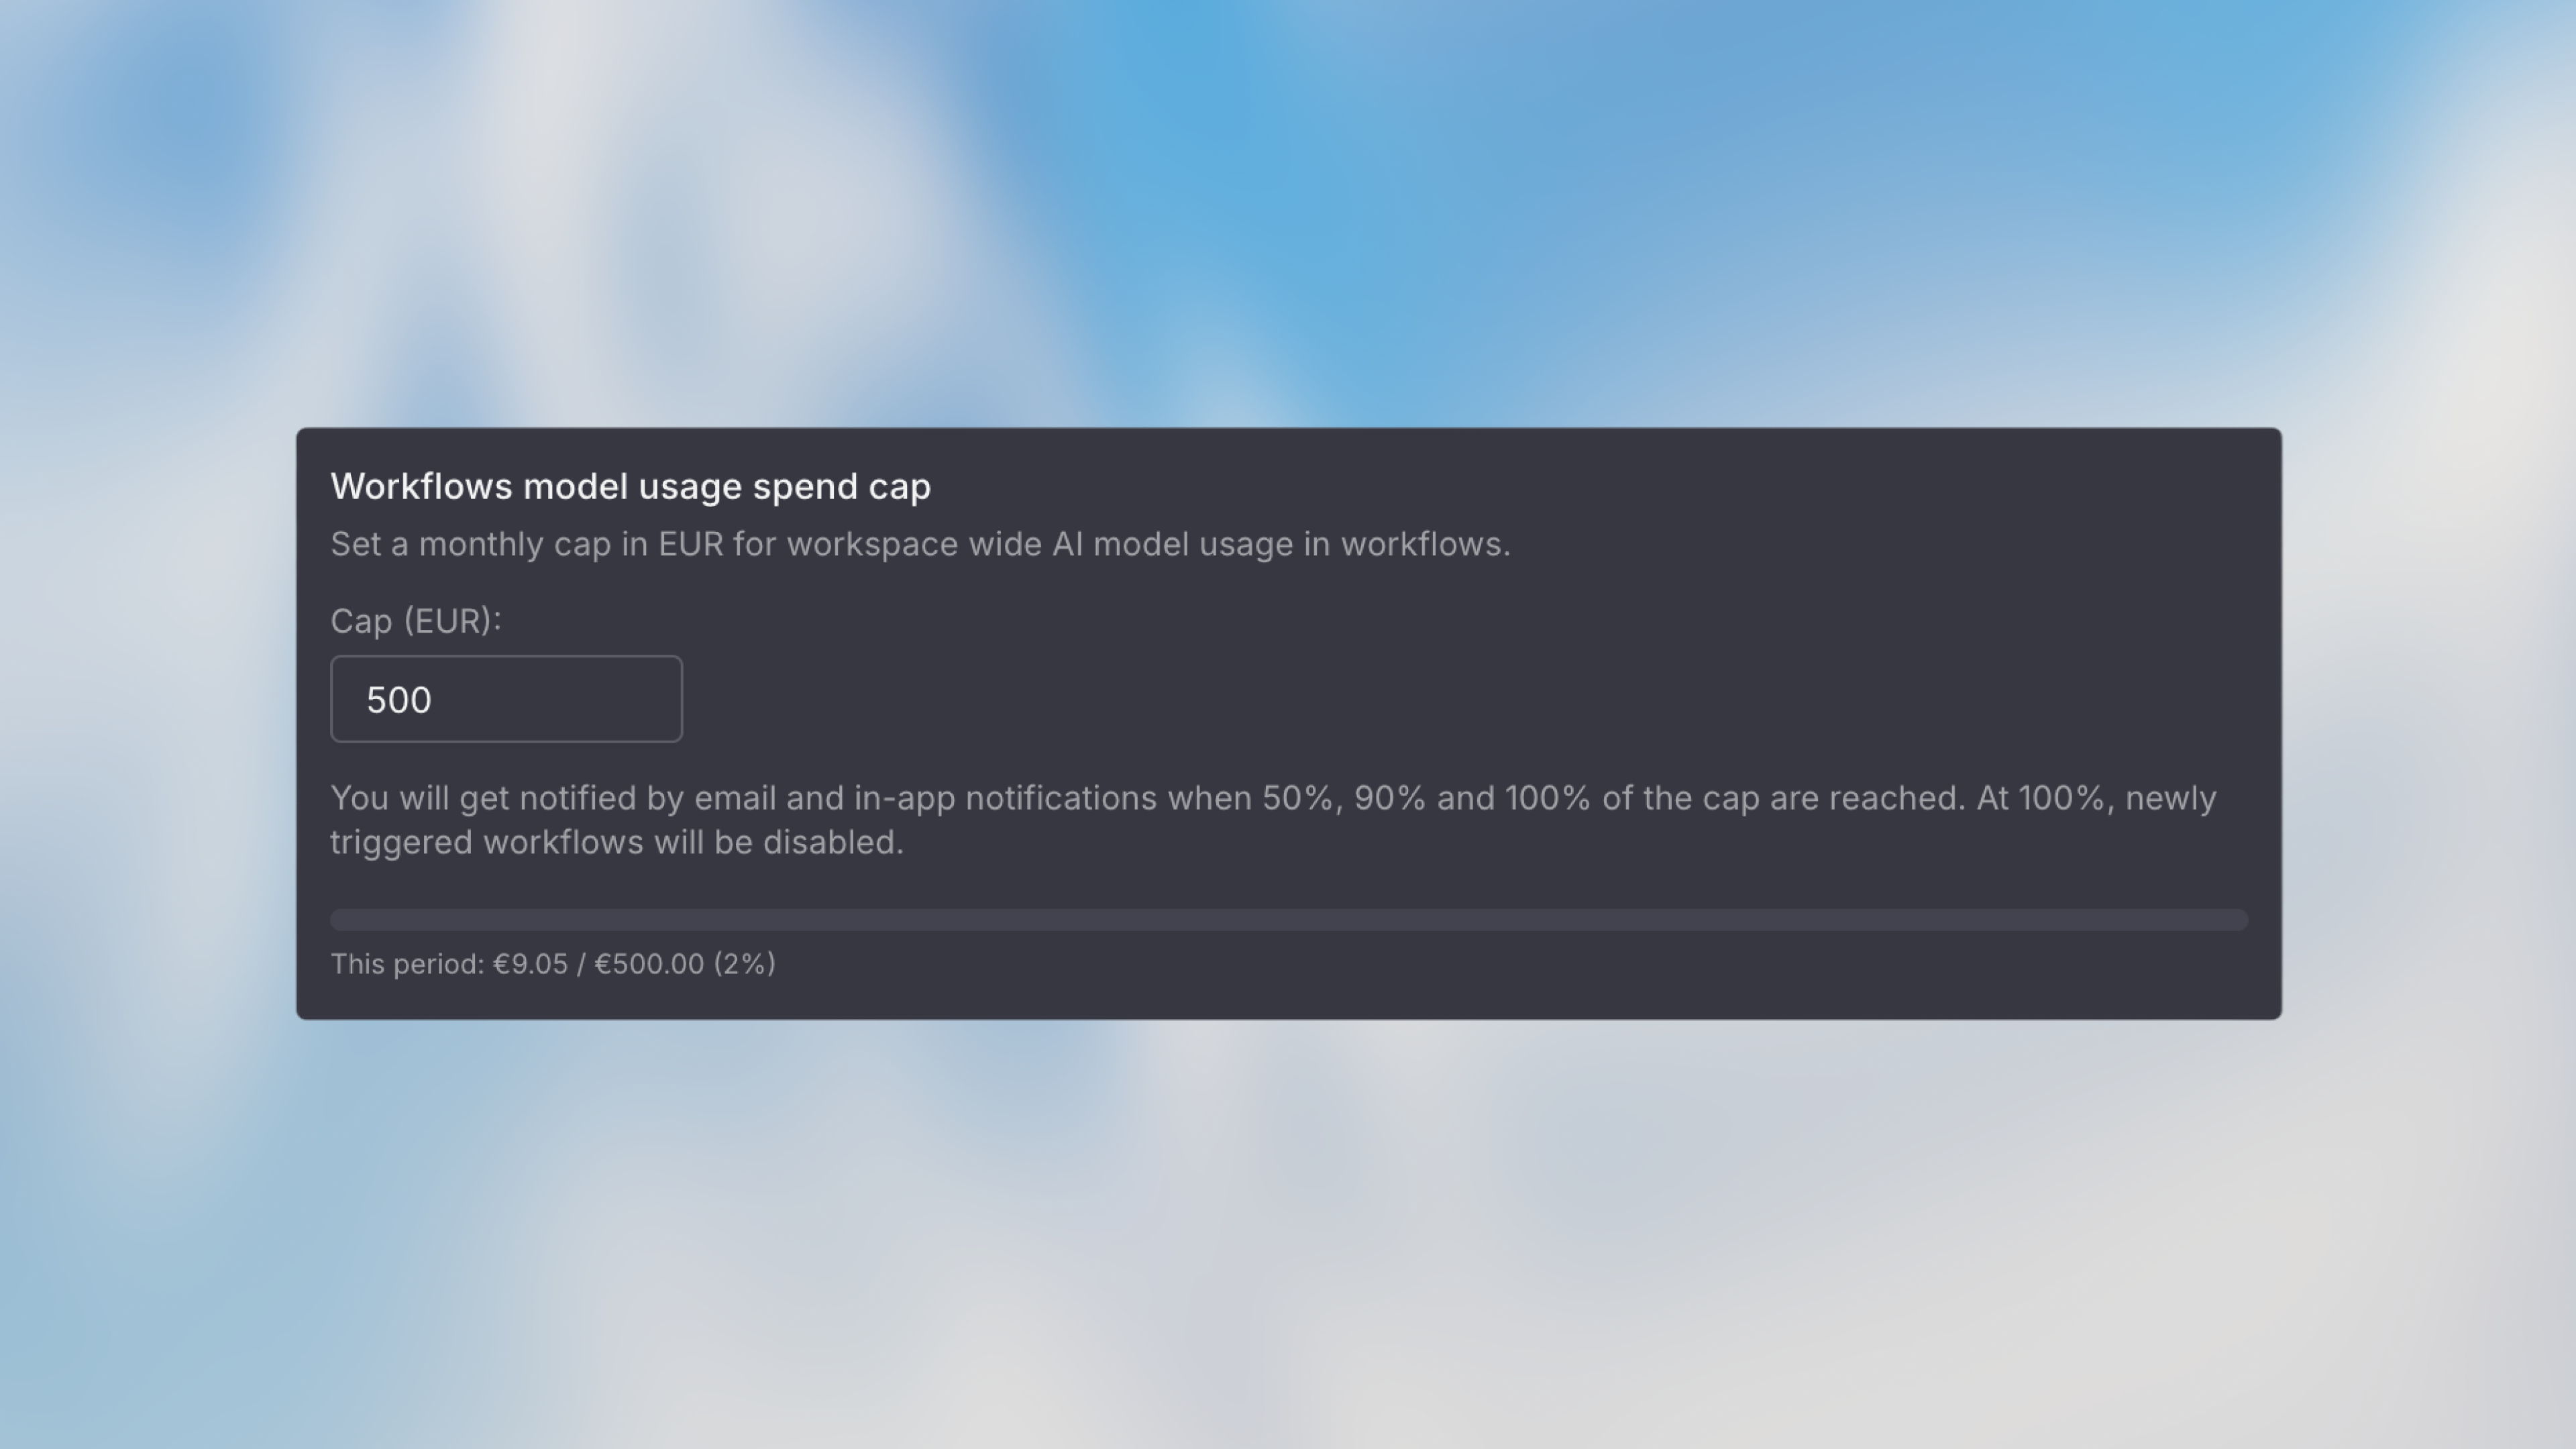
Cost limits are enforced at multiple levels. Higher-level limits take precedence:Workspace-Level Limits (Admin)
Admins can set workspace-wide limits in Settings → Products → Workflows:| Setting | Description |
|---|---|
| Workspace Spend Cap | Maximum total spend across all workflows (default: €500/month) |
| Max Monthly Limit Per Workflow | Caps what users can set as their workflow’s monthly limit |
| Monthly Run Limit | Maximum workflow executions per month (based on plan) |
Workflow-Level Limits (User)
Users can set limits per workflow (within admin constraints):| Setting | Description |
|---|---|
| Monthly Limit | Capped by admin’s “Max Monthly Limit Per Workflow” setting |
| Per-Execution Limit | Stops a single run if it exceeds this amount |
| Hourly Rate Limit | Maximum executions per hour |
The workflow monthly limit cannot exceed the admin-configured maximum. If an admin sets the max at 50.
Optimization Strategies
Choose the Right Model
Don’t use premium models for simple tasks:| Task | Model Choice |
|---|---|
| Extract email from text | Smaller/faster model ✅ |
| Complex reasoning | Larger model ✅ |
| Date formatting | Code node (free) ✅ |
Optimize Agent Prompts
Shorter, clearer prompts cost less and work better:Use Code for Simple Transformations
Don’t use AI for tasks that code can handle: Free with Code Node:- Date/time formatting
- Mathematical calculations
- Data filtering and sorting
- String manipulation
- JSON parsing/formatting
Cost-Effective Patterns
Smart Filtering
Filter data before sending to AI:Progressive Enhancement
Start cheap, escalate only if needed:Estimating Costs Before Launch
1. Count Expected Runs
- Forms: Expected submissions per month
- Scheduled: Runs per day × 30
- Webhooks: Events per month from integration
2. Test with Real Data
Run 5-10 tests and check the cost badges:3. Set Appropriate Limits
Next Steps
Agent Node
Understand agent node costs and optimization
Code Node
Use code for free transformations