Set up your own OAuth application for integrations to control scopes, enable additional integrations, or replace Langdock’s default OAuth client with your custom configuration.
When you configure a custom OAuth client, Langdock routes all authentication flows through your OAuth application instead of the default Langdock client. This means:
Your branding (custom name and logo) appears in consent screens
Your tenant policies control user access and admin consent requirements
Your rate limits apply to API calls made by your users
1
Create OAuth App at Provider
Register a new OAuth application in your provider’s developer portal (Google Cloud Console, Microsoft Azure, etc.).Required Configuration:
Copy the exact redirect URL from Langdock’s integration settings
Select all required scopes shown in Langdock for that integration
Configure any tenant-specific settings (admin consent, allowlisting)
2
Gather Credentials
Note down the following from your OAuth app:
Client ID (always required)
Client secret (required for most integrations)
Tenant ID (optional, shown for Microsoft integrations only)
3
Configure in Langdock
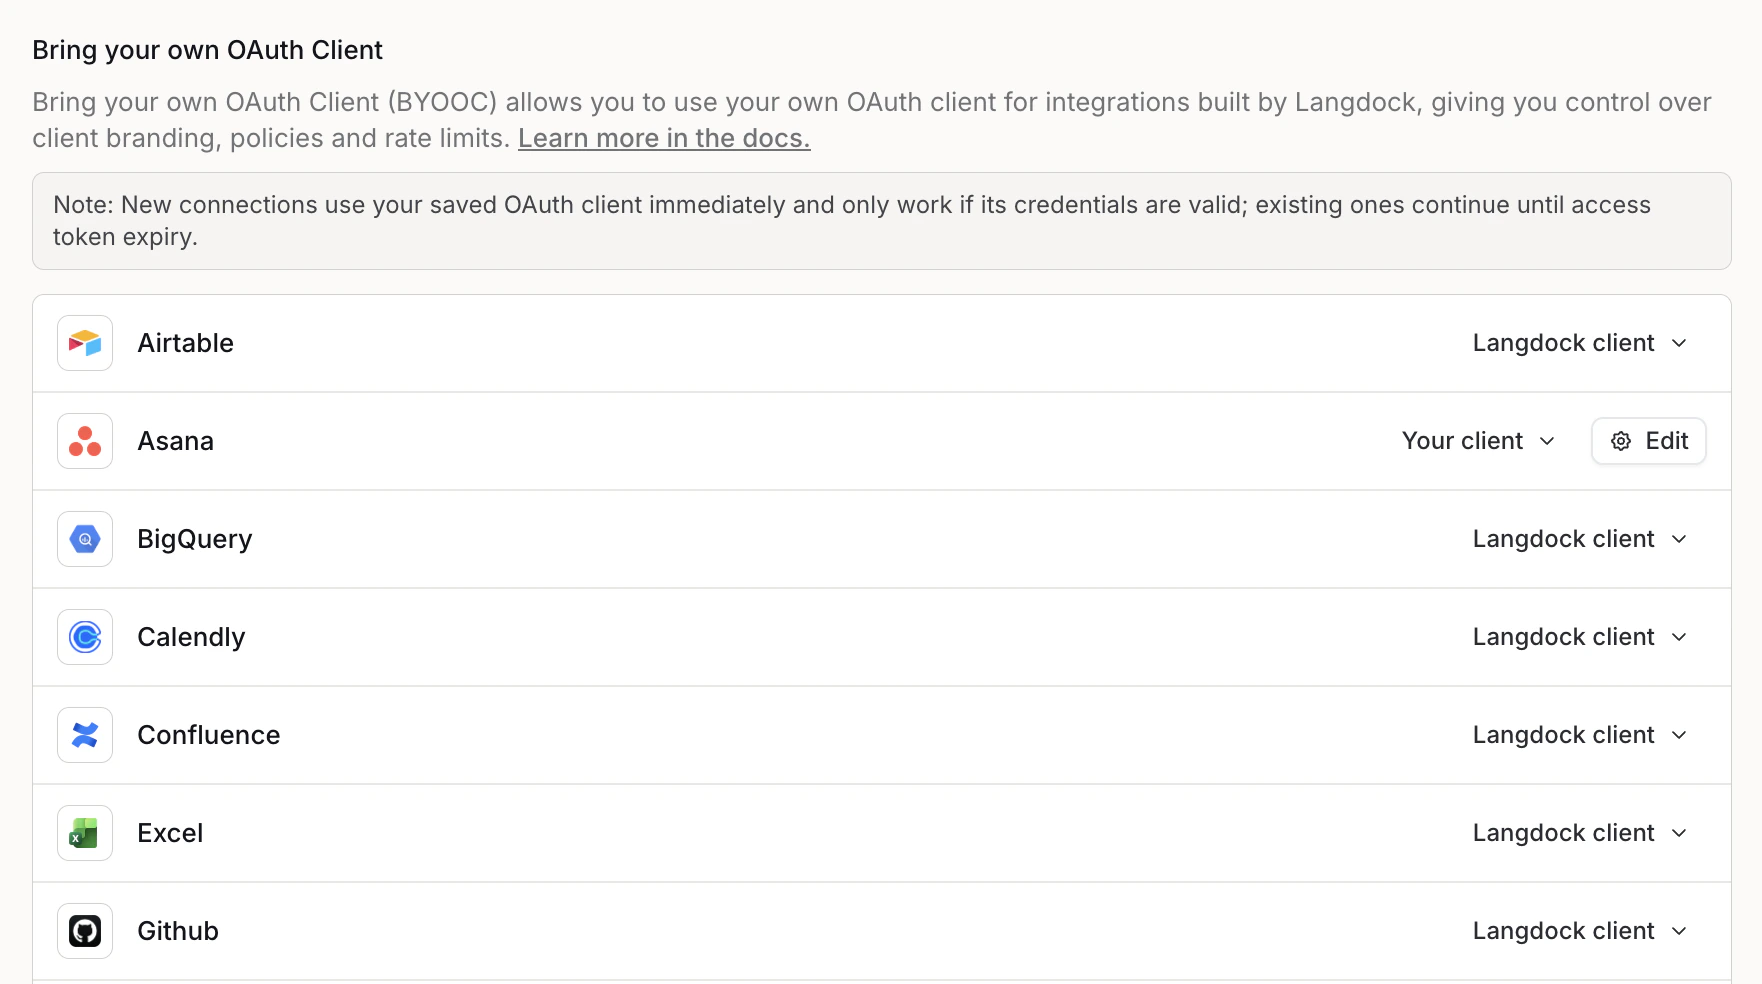
Navigate to Workspace settings → Integrations and scroll to the Bring your own OAuth Client section. You will see a list of OAuth integrations, each showing its current client status.Depending on the integration’s current state, do one of the following:
If the integration has a Langdock client available, open the dropdown and select Your client to open the configuration dialog.
If no Langdock client exists and no custom client is configured, click the Configure button.
If no Langdock client exists and your custom client is already configured, you will see Your client displayed alongside an Edit button. Click Edit to modify your configuration.
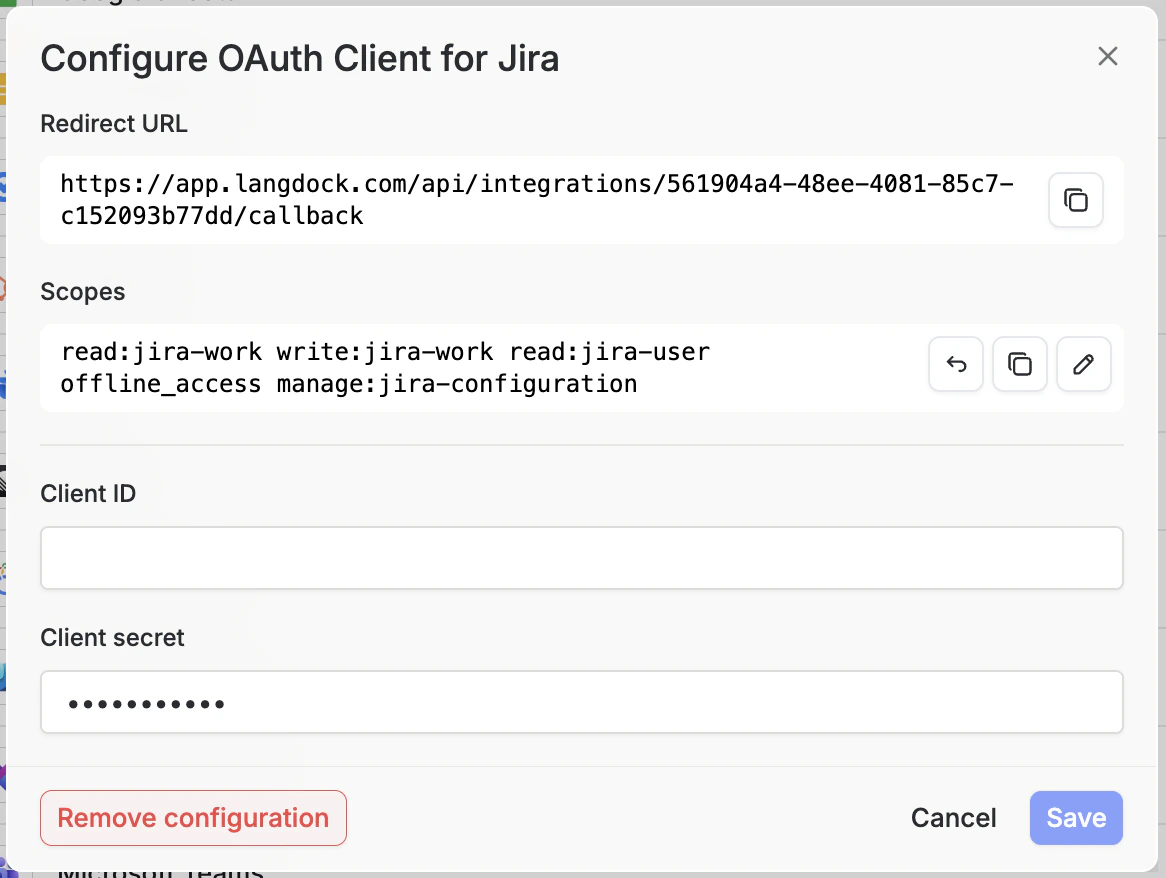
In the configuration dialog, copy the Redirect URL into your OAuth app and review the Scopes section. Make sure all listed scopes are enabled in your OAuth app — missing scopes will cause an insufficient scopes error. You can copy all scopes at once using the copy button.Enter your Client ID and Client secret (and Tenant ID if prompted for Microsoft integrations), then click Save.
New connections will immediately use your OAuth client and will only work if the credentials are valid. Existing connections continue working until their access tokens expire.
The redirect URL must match exactly. Any mismatch will cause redirect_uri_mismatch errors. The exact domain depends on your Langdock deployment — always copy the redirect URL from the dialog rather than constructing it manually.
Displays the OAuth scopes required for the integration to function correctly. For example, Jira requires scopes like read:jira-work, write:jira-work, read:jira-user, offline_access, and manage:jira-configuration.
Copy: Copy all scopes to your clipboard for pasting into your OAuth app configuration.
Edit: Switch to edit mode to customize scopes in a text area (advanced use cases only).
Reset to default scopes: Restore the original scope list if you have modified it.
All listed scopes must be enabled in your OAuth app. Missing scopes will cause insufficient_scope errors when users try to connect.
Enter your OAuth application credentials:
Client ID (required): Your app’s public identifier
Client secret (required for most integrations): Your app’s private key, stored encrypted
Tenant ID (Microsoft integrations only, optional): Your Azure AD tenant identifier
If you want to stop using your custom client and revert to Langdock’s default:
Open the dropdown next to the integration and select Langdock client.
Confirm the switch in the dialog.
New connections will use Langdock’s client going forward. Existing connections made with your custom client continue working until their access tokens expire.
Some of our integrations can only be used when providing your own OAuth client. Details on how to connect them with Langdock are described in this section.
To enable this integration for your workspace, your ServiceNow system administrator must create an OAuth client, in the form of an application registry in ServiceNow, following this documentation. Required authentication fields
Provide ServiceNow Subdomain
When a user wants to create a connection with ServiceNow, they have to provide the subdomain of your ServiceNow instance.
Are self-hosted or cloud-hosted accounts supported?
Only Cloud-hosted accounts are currently supported.
Is a paid ServiceNow plan required?
A paid ServiceNow account is required to create an application registry. View ServiceNow’s plans here.
Are any special account permissions / roles required?
Yes. To connect by OAuth, your systems administrator should set up the right configuration within your instance to connect any user using an OAuth connection. E.g. all users need the oauth_user role to be able to connect. Learn more about ServiceNow’s groups and permissions
Are there usage limits?
Yes. ServiceNow implements rate limiting to prevent excessive API usage. System administrators can configure rules that restrict the number of inbound REST API requests processed per hour. Learn more about ServiceNow’s usage limits.
Configuring your own OAuth client for Snowflake gives you control over authentication policies, token validity periods, and IP allowlisting within your Snowflake environment.
Show how to configure a Snowflake OAuth client
Required Information:
OAuth Redirect URL: Copy this from Langdock’s Snowflake integration settings page
Client ID: Generated by Snowflake after creating the security integration
Client Secret: Generated by Snowflake after creating the security integration
Authorization URL: Your Snowflake account’s authorization endpoint
The Redirect URL from Langdock must be provided in Snowflake, while the Client ID, Client Secret, and Authorization URL from Snowflake must be entered into Langdock’s integration settings.
If your Snowflake account has network policies or IP allowlisting enabled, you may need to whitelist Langdock’s static IP address to allow connections. See Static IP Configuration for details.
Replace <integration_name> with a descriptive name and <your_redirect_uri> with the OAuth Redirect URL from Step 1.
Run the query to create your new security integration in Snowflake.
Note: Adjust your OAUTH_REFRESH_TOKEN_VALIDITY value based on your security policies.
3
Retrieve Client ID and Client Secret
Show how to retrieve your Client ID, and Secret from Snowflake
Within the same workspace, run the following query: